프로젝트를 C++로 만들고 이름을 Shooting이라고 한다.
C++Class를 하나 만들고 PlayerPawn이라고 한다.
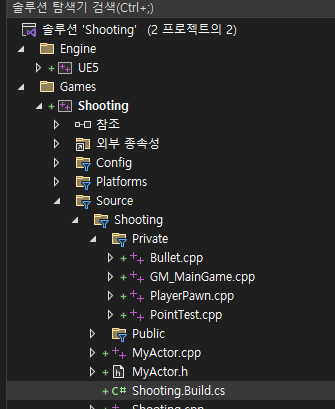
VisualStudio가 열리면 프로젝트명+Build.cs를 연다. 여기서는 ShootingBuild.cs이다.
PublicDependencyModuleNames.AddRange(new string[] { "Core", "CoreUObject", "Engine", "InputCore" }); 맨 뒤에 , "EnhancedInput"를 추가해준다. 이래야 언리얼 C++에서 EnhancedInput 관련 작업을 할 수 있다.
using UnrealBuildTool;
public class Shooting : ModuleRules
	public Shooting(ReadOnlyTargetRules Target) : base(Target)
	{
		PCHUsage = PCHUsageMode.UseExplicitOrSharedPCHs;
		PublicDependencyModuleNames.AddRange(new string[] { "Core", "CoreUObject", "Engine", "InputCore", "EnhancedInput" });
언리얼 에디터를 닫고고 디버그하지 않고 시작을 누른다.

언리얼에디터가 나타나면 앞을 참조해서 InputAction 과 Input Mapping Context를 미리 만들자.
2023.10.17 - [언리얼엔진/c++클래스 만들어보기] - EnhancedInput 연습
이제 C++클래스를 만든다. 부모는 Pawn으로 하고 이름은 PlayerPawn이다.
PlayerPawn.h 맨아래 다음을 추가한다. UBoxComponent는 충돌을 감지하는 컨포넌트이고 UStaticMeshComponent는 StaticMesh를 연결할 컴포넌트이다.
	UPROPERTY(EditAnywhere)
	class UBoxComponent* boxComponent;

	UPROPERTY(EditAnywhere)
	class UStaticMeshComponent* meshComponent;
protected:에 UInputMappingContext와 UInputAction 포인트를 마련한다.
protected:
	// Called when the game starts or when spawned
	virtual void BeginPlay() override;

	UPROPERTY(EditAnywhere, BlueprintReadOnly, Category = Input)
	UInputMappingContext* PlayerMappingContext;
	UPROPERTY(EditAnywhere, BlueprintReadOnly, Category = Input)
	UInputAction* MoveAxis;

	void Move(const FInputActionValue& value);  //Input
이것때문에[ 나중에 C++클래스로 블루프린트를 만들면 오른쪽에 InputAction과 ImputMappingContext를 연결할 곳이 마련된다.

컴파일을 위해 다음과 같은 헤더들이 필요하다.
#include "CoreMinimal.h"
#include "GameFramework/Pawn.h"
#include "InputAction.h"
#include "InputActionValue.h"
#include "PlayerPawn.generated.h"
나중에 사용할 Move도 선언해준다.
void Move(const FInputActionValue& value); //Input이제부터 PlayerPawn.cpp이다. 헤드파일들이 필요하다.
#include "PlayerPawn.h"
#include "Components/BoxComponent.h"
#include "Components/StaticMeshComponent.h"
#include "EnhancedInputSubsystems.h"
#include "EnhancedInputComponent.h"
헤더에서 선언한 boxComponent, meshComponent를 생성해준다. boxComponent에 meshComponent를 붙여준다
APlayerPawn::APlayerPawn()
{
 	// Set this pawn to call Tick() every frame.  You can turn this off to improve performance if you don't need it.
	PrimaryActorTick.bCanEverTick = true;

	boxComponent = CreateDefaultSubobject<UBoxComponent>(TEXT("MyBoxComponent"));
	SetRootComponent(boxComponent);

	const FVector boxSize = FVector(32.f, 32.f, 50.f);
	boxComponent->SetBoxExtent(boxSize);
	//boxComponent->SetBoxExtent(FVector(32.f, 32.f, 50.f));
	meshComponent = CreateDefaultSubobject<UStaticMeshComponent>(TEXT("MyStaticMesh"));
	meshComponent->SetupAttachment(boxComponent);
	const FVector relativePos = FVector(0, 0, -50.f);
	meshComponent->SetRelativeLocation(relativePos);
 }
// Called when the game starts or when spawned
void APlayerPawn::BeginPlay()
{
Super::BeginPlay();
if (APlayerController* PlayerController = Cast<APlayerController>(GetController()))
{
if (UEnhancedInputLocalPlayerSubsystem* Subsystem =
ULocalPlayer::GetSubsystem<UEnhancedInputLocalPlayerSubsystem>(PlayerController->GetLocalPlayer()))
{
Subsystem->AddMappingContext(PlayerMappingContext, 0);
}
}
}이 부분은 블루프린트에서 구현하면 다음과 같다.

InputComponent설정부분이다. 여기서 MoveAxis, Move등을 연결해서 value를 전달해준다
void APlayerPawn::SetupPlayerInputComponent(UInputComponent* PlayerInputComponent)
{
	Super::SetupPlayerInputComponent(PlayerInputComponent);
	if(UEnhancedInputComponent* EnhancedInputComponent =
		CastChecked<UEnhancedInputComponent>(PlayerInputComponent))
	{
		EnhancedInputComponent->BindAction(MoveAxis, ETriggerEvent::Triggered, this, &APlayerPawn::Move);
	}

}
전달받은 키입력 value를 표시하고 액터를 움직여줄 Move()를 정의한다.
void APlayerPawn::Move(const FInputActionValue& value)
{
	const FVector CurrentValue = value.Get<FVector>();
	if (Controller) {
		UE_LOG(LogTemp, Warning, TEXT("X::%f"), CurrentValue.X);
		UE_LOG(LogTemp, Warning, TEXT("Y::%f"), CurrentValue.Y);
		//P0 + vt = P
		SetActorLocation(GetActorLocation() + CurrentValue * 100.f * GetWorld()->GetDeltaSeconds());
	}
}
'언리얼엔진 > c++클래스 만들어보기' 카테고리의 다른 글
| EnhancedInput 연습 (1) | 2023.10.17 |
|---|---|
| UE5 C++클래스 Character상속 (1) | 2023.10.17 |
| MyPawn에서 키입력 받기 (0) | 2023.10.16 |
| UE5 GameModeBase (0) | 2023.10.15 |
| UE5 빌드 환경 설정 및 컴파일 방법 (0) | 2023.10.14 |


